Build a virtual pet in Godot
You’ll build a little pet that lives on your desktop: a Godot game with no window frame and no background, just your sprite. It walks along your screen, turns around at the edges, stops for a rest now and then, and you can pick it up and drag it around.
Set up Godot
Godot is a free, open source game engine. Game engines are used to make games easily. Go to godotengine.org to install it. If you cannot install it, you can also use the web editor at editor.godotengine.org.
Open Godot, click Create New Project, name your game, select the Compatibility renderer, for Project Path select a Game folder, and click Create.
Install Godot Hackatime, and set up Hackatime on your machine
Open the Asset Store tab, search for Wakatime, and install “Godot Super Wakatime” by BartoszB
If needed, set up Hackatime according to the guide, here: https://hackatime.hackclub.com/docs/getting-started/quick-start
Make a GitHub Repository
GitHub is a website that allows anyone to share their code, and keep it safe.
Go to github.com and sign up if you don’t already have an account.
open https://github.com/new to create a new repository, name it, make it public. Don’t add a license or gitignore as this will make the next step harder. You can add one later !
Sync your Godot project with the GitHub repo you just made
macOS
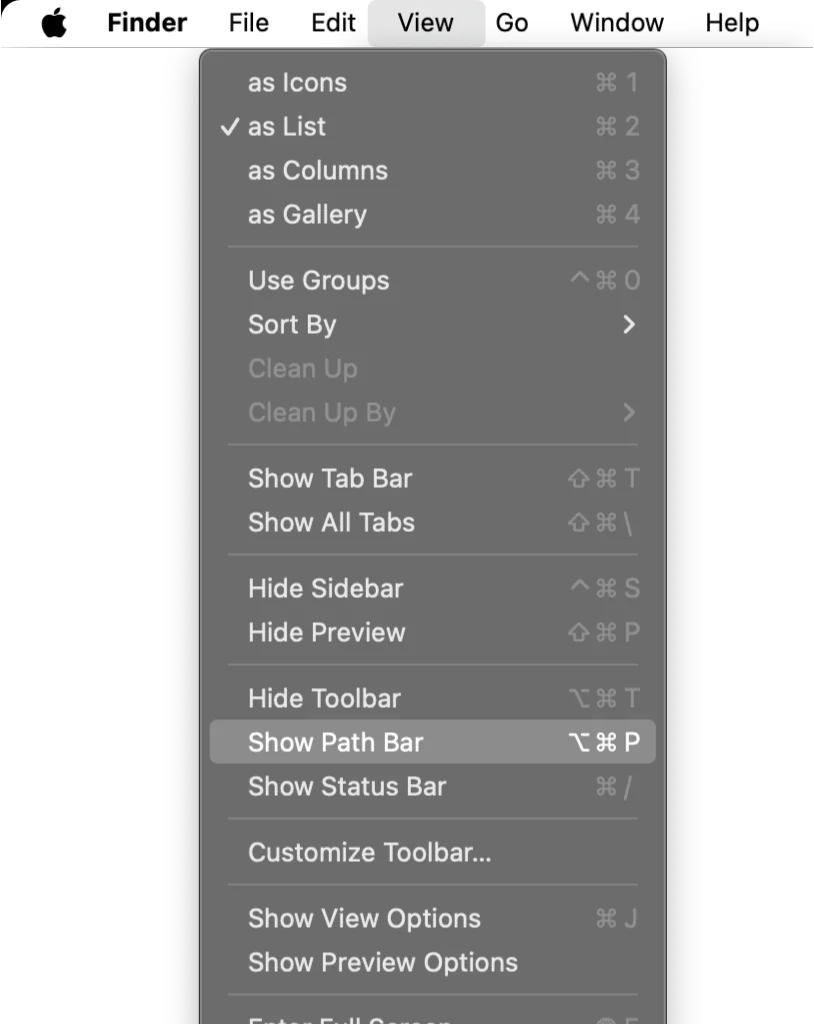
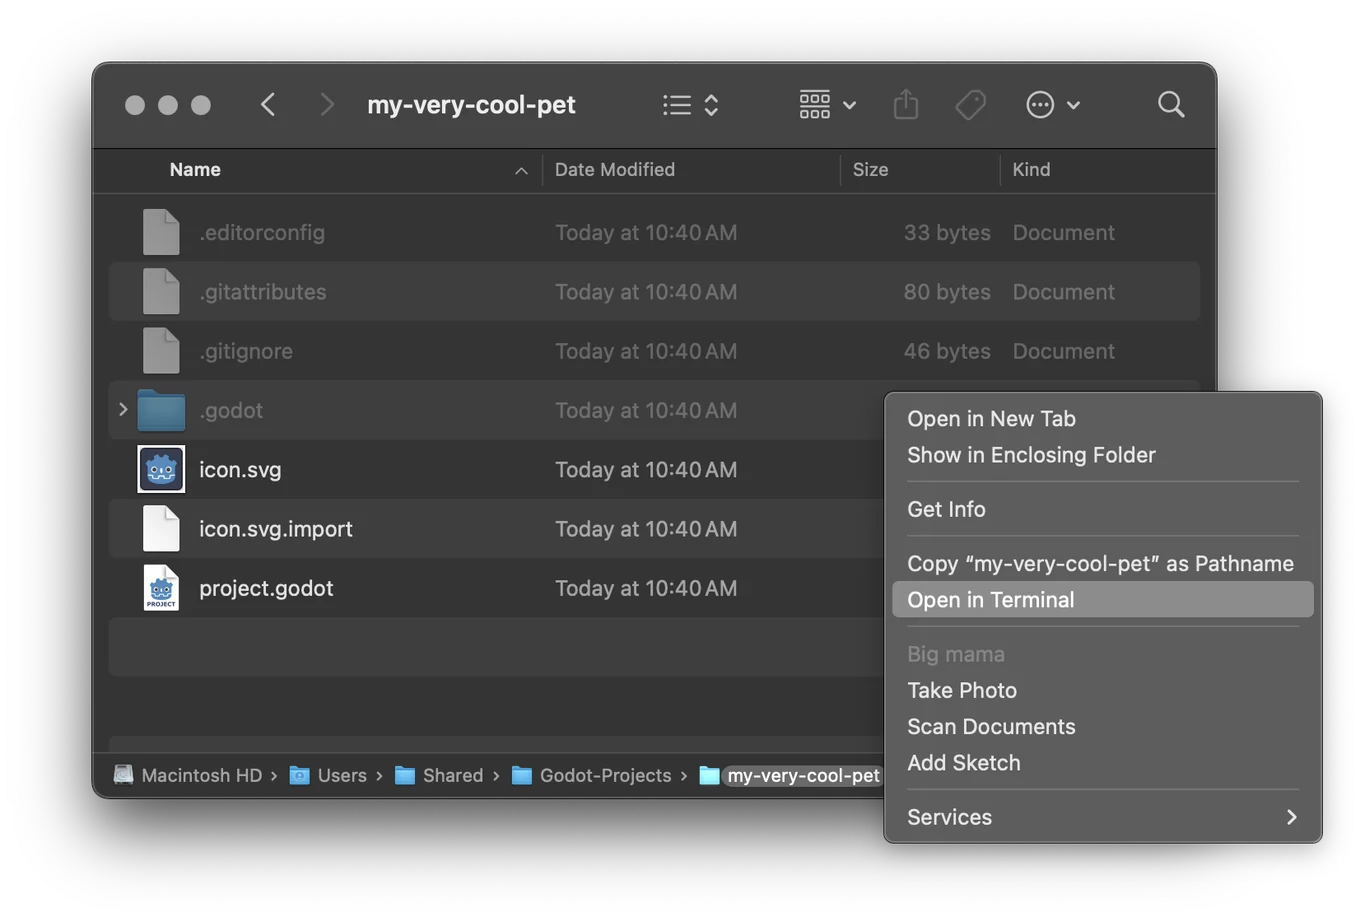
open your project folder in the terminal, you can do that by navigating to your project folder in Finder, and right clicking on it in the path bar and selecting ‘Open in terminal’
Windows
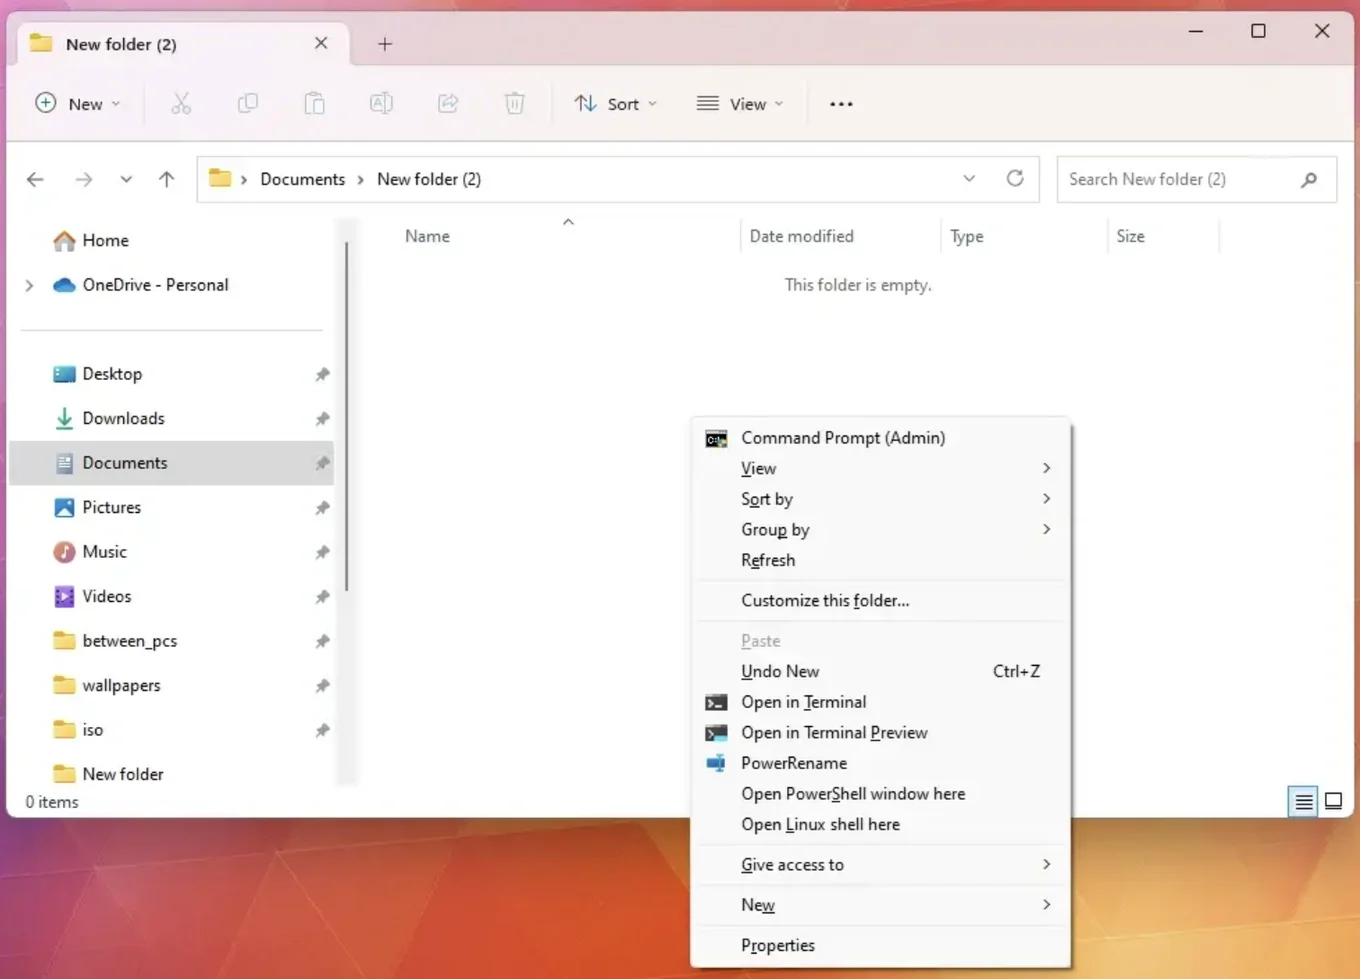
open your project folder in the terminal, you can do that by navigating to your project folder in the file explorer, holding down Shift, and then right clicking to open a context menu, and then click open in Terminal.
Linux
open your project folder in the terminal, you can do that by right clicking the folder in your file manager and choosing ‘Open in Terminal’
in the terminal, run
git init
git branch -M main
Go to the GitHub repository you created in the browser earlier and copy the link, and replace <your-github-repository-link> with your link, and then run it
git remote add origin <your-github-repository-link>
git add .
git commit -m "initialize"
git push -u origin main
Important commands
In Godot
Save your project often using Command S on macOS or Ctrl+S on Windows and Linux.
Play your game with Command B on macOS or F5 on Windows and Linux.
In the terminal
Be sure to commit regularly
git add .
git commit -m "things-added"
git push
Finally, we’re set up! Let's start making the pet
Let's start by making a 2D scene, this will be the world your pet will live in.
Click 2D scene in Godot to create a 2D scene
then press Command S on macOS or Ctrl+S on Windows and Linux to save, and give your scene a name.
Now that you have the scene, let's add some things to it.
In the Scene panel (top left), click + to add a new node.
- type animatedSprite 2D into the search bar.
- Select AnimatedSprite2D, and click Create.
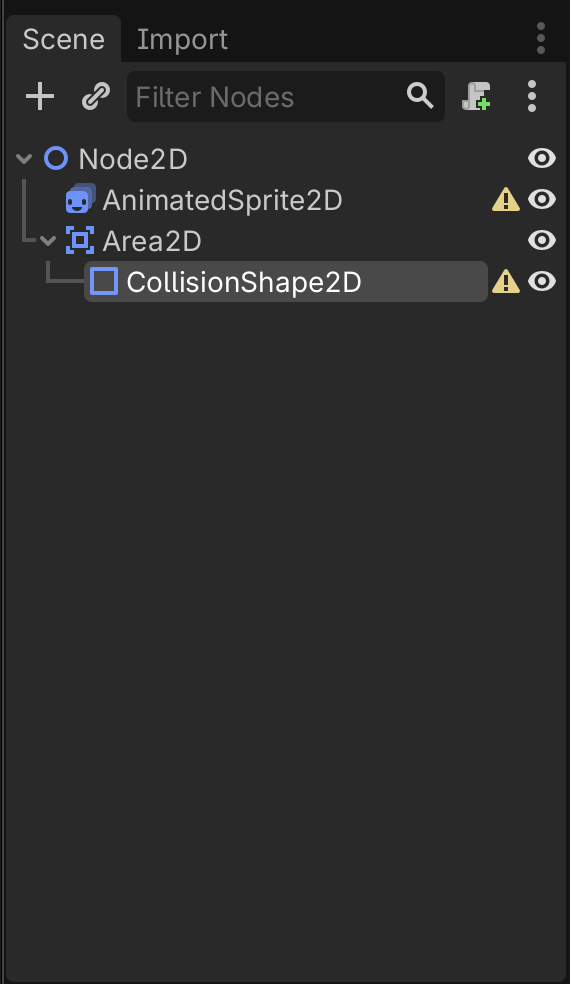
Repeat this process to add an Area2D node and a CollisionShape2D node.
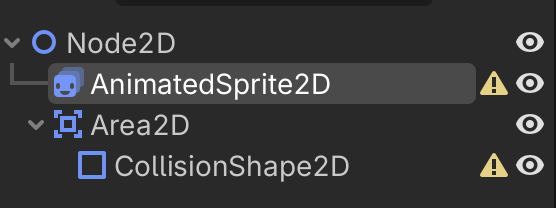
Drag the CollisionShape2D node onto the Area2D node so the CollisionShape2D node becomes a child of the Area2D node
Once you’ve done that your scene tree should look like this.
Let's make the scene transparent!
By default a Godot window has a background, but we want our sprite to sit on the desktop with no background!
to do this we need to adjust the project’s settings.
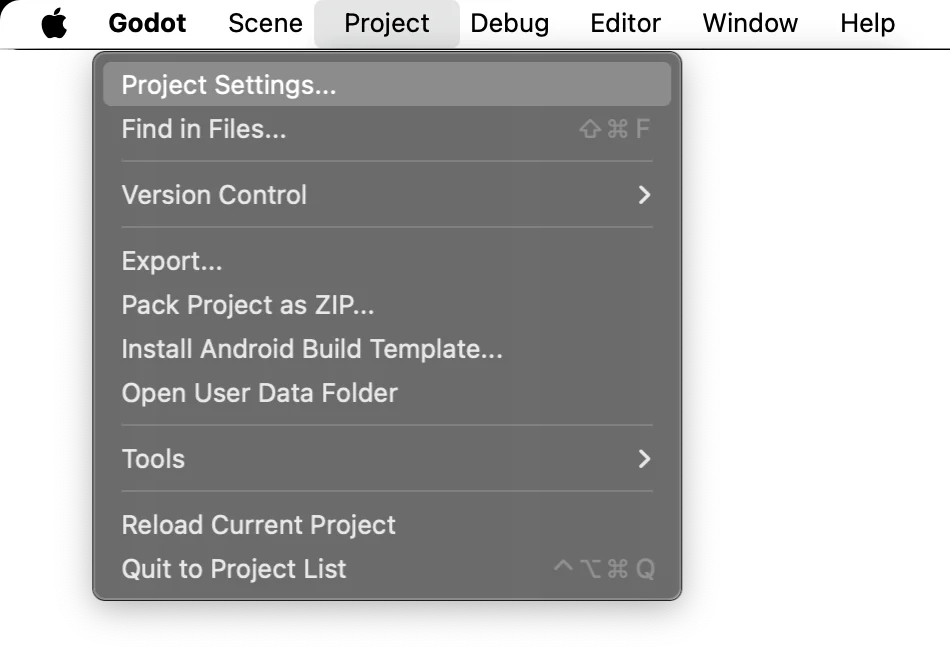
Click Project > Project Settings…
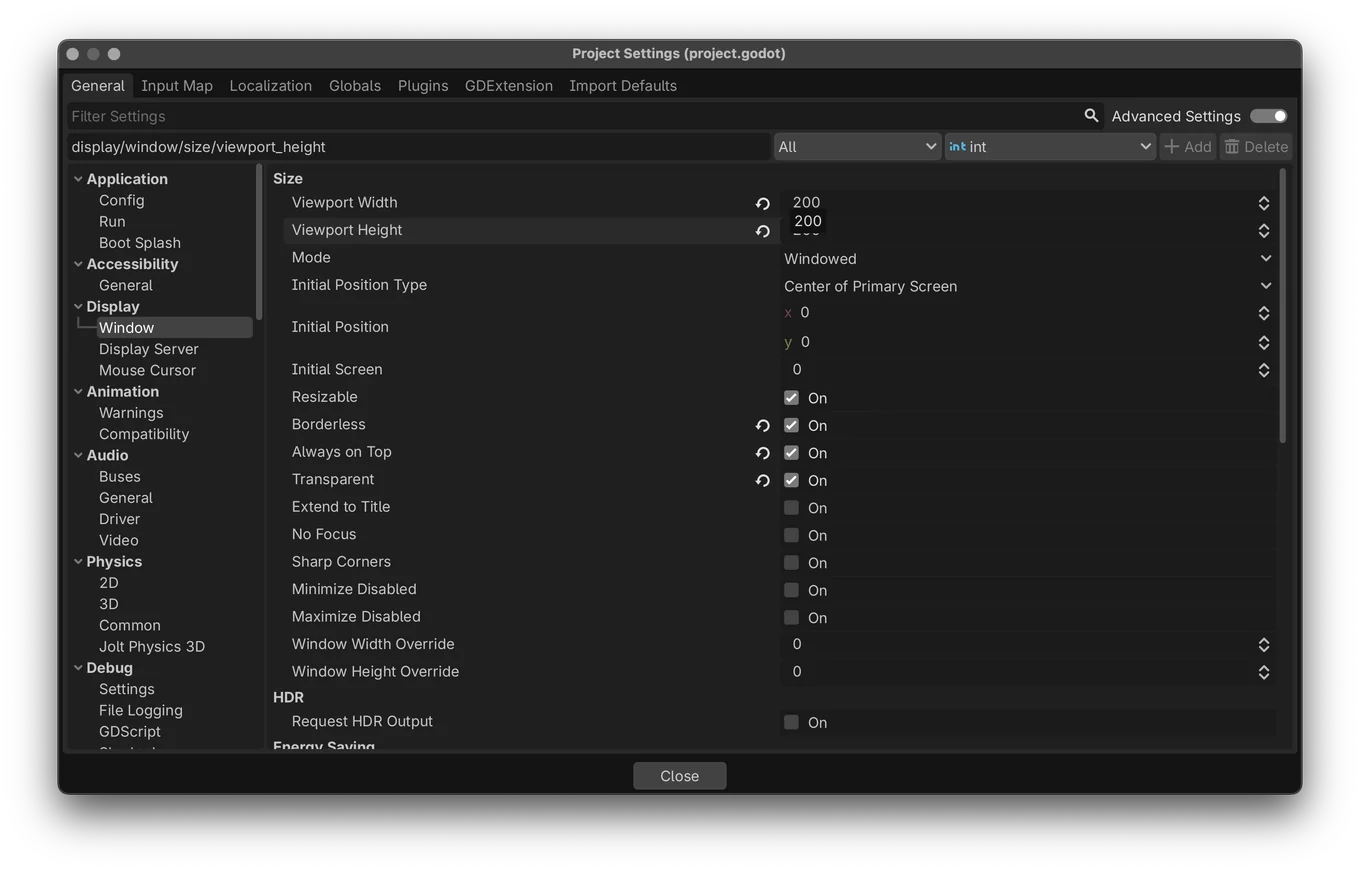
under the Window tab on the left of the Project Settings menu we want to change a couple settings.
set Viewport Width to 200, and Viewport Height to 200. Just enough for your pet!
make sure
- Borderless
- Always on Top
- Transparent
are on
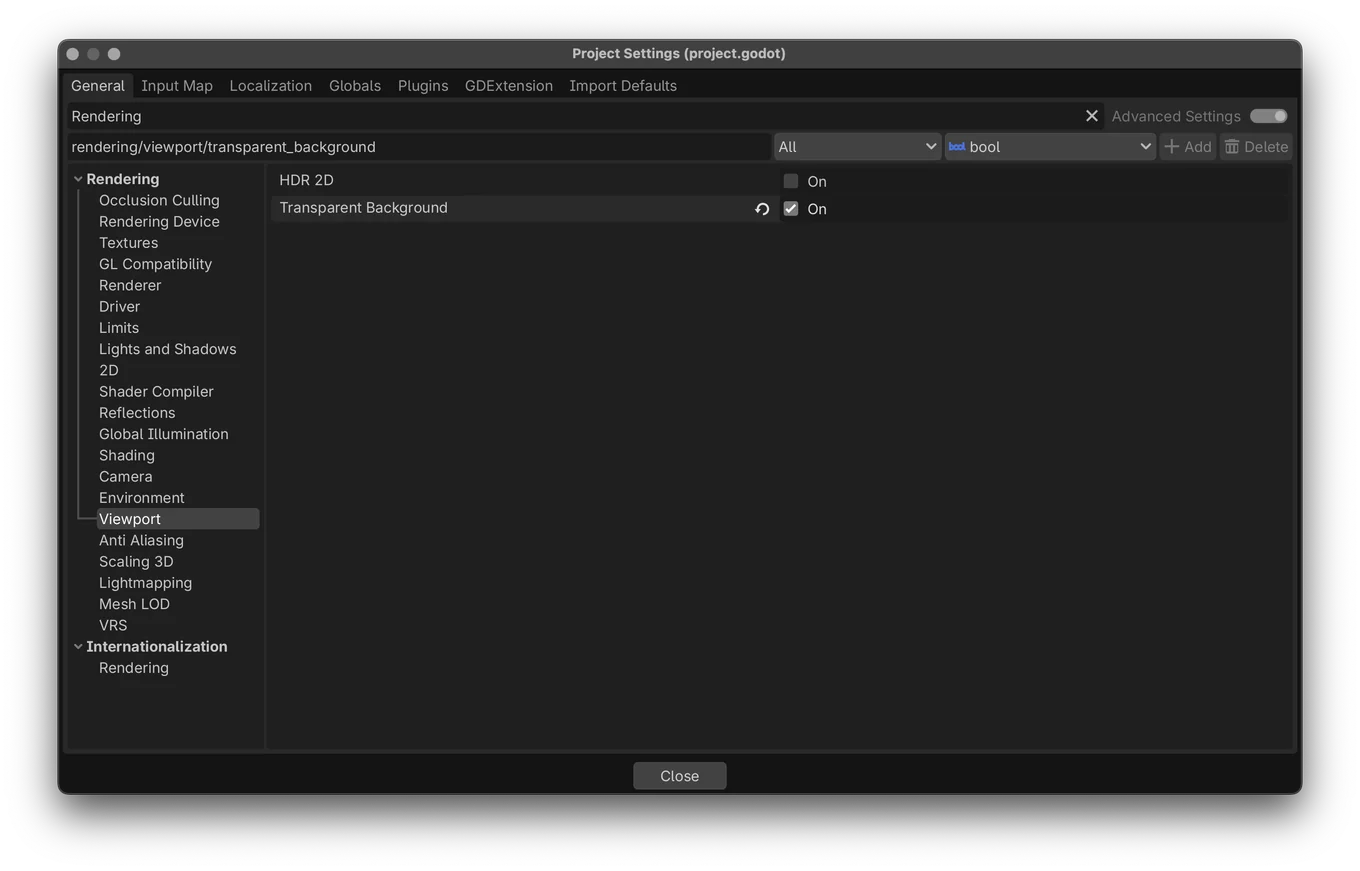
once you’ve done that search for Rendering in the top bar, select Viewport and enable Transparent Background
And finally search for Per Pixel, select Window and enable Per Pixel Transparency
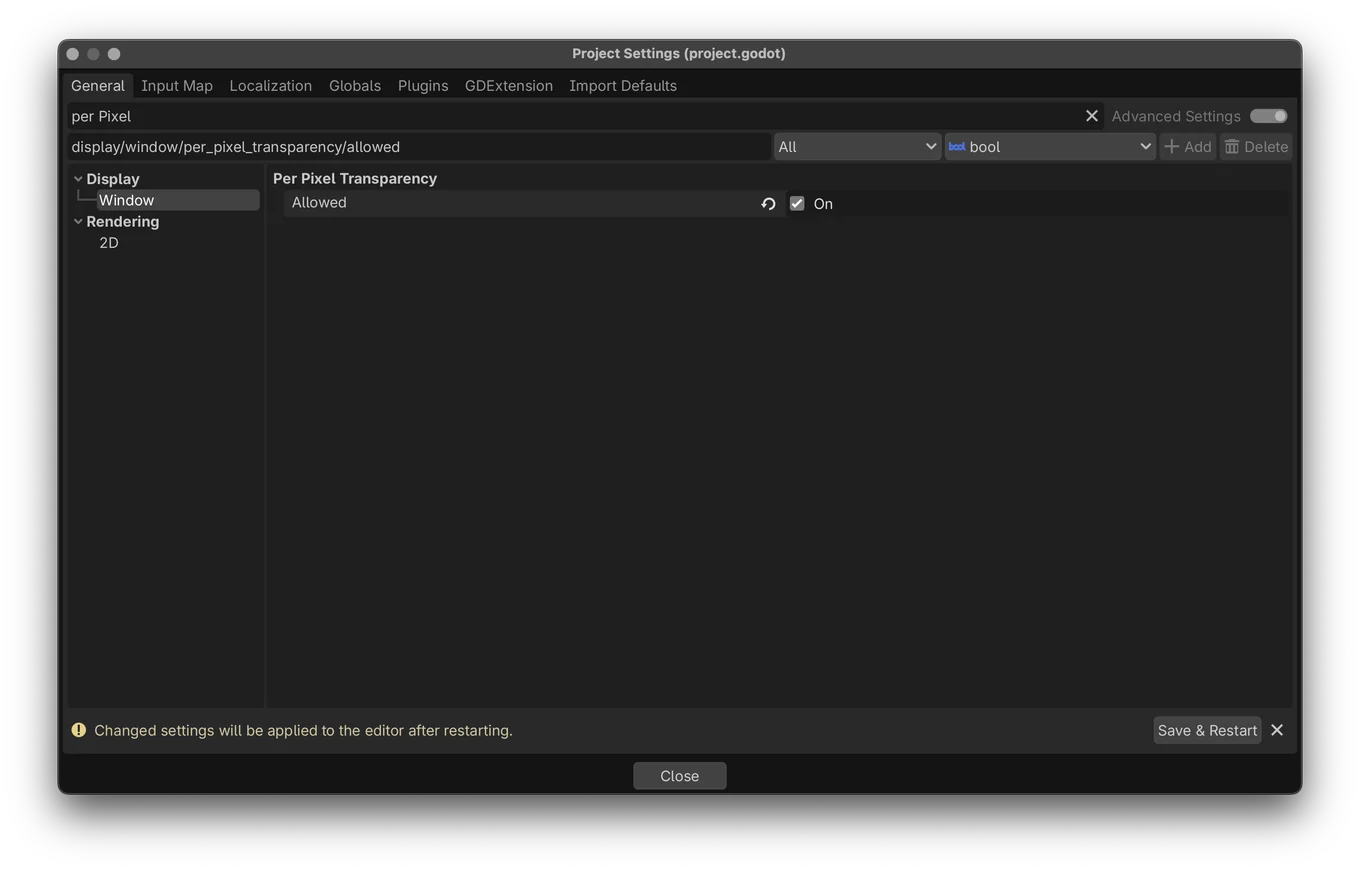
You’ll see a pop up at the bottom prompting to save & restart. Click the button and wait for Godot to restart

Making it pretty!
I’m using this free sprite pack I found on itch.io you can use assets you find online as long as the license allows for it, but I encourage you to make your own art, or commission a friend.
https://smithygames.itch.io/crow-sprite
import your pet’s assets into your project’s FileSystem, you can do this by just dragging your assets in.
To add animations, select AnimatedSprite2D in the Scene tree in the top left,
Add a new SpriteFrames resource to the AnimatedSprite2D on the right in the inspector
If you’re using a Sprite Sheet like me, you can use the Add Frames from Sprite Sheet button to slice your Sprite Sheet into its individual frames, else you can easily add frames individually rather than using a Sprite Sheet.
Slice your Sprite Sheet, and rename the animation.
Add more animations for each state your pet has, I’m going to make Walk, and Idle
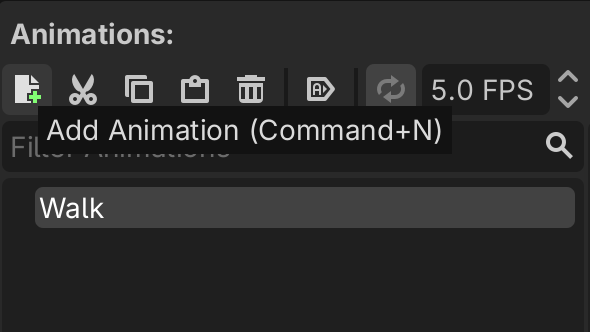
Click play to see your animation!
Select the CollisionShape2D, assign a RectangleShape2D to the Shape field, and scale it to fit the sprite
Yay! The scene is set up, now we can add the functionality
Attach a script to the base Node2D node
- Select Node2D in the Scene tree
- Click the create script button
- Name it whatever you want
Remove everything except for extends Node2D
1. Movement
extends Node2D

var speed = 300
var direction = Vector2(1,0)

func _physics_process(delta: float) -> void:
	var window_position = Vector2(DisplayServer.window_get_position())
	window_position += direction * speed * delta
	print(window_position)
	DisplayServer.window_set_position(Vector2i(window_position))
_physics_process runs about 60 times a second. Each time it runs, we:
- get the window's current position,
- nudge it in our
directionbyspeedpixels per second, and - put the window at the new position.
delta is the time since the last frame. Multiplying by it keeps the speed the same no matter how fast your computer is.
direction = Vector2(1, 0) means "go right". Vector2(0, 1) would be "go down".
Press Command B on macOS or F5 on Windows and Linux to test it out!
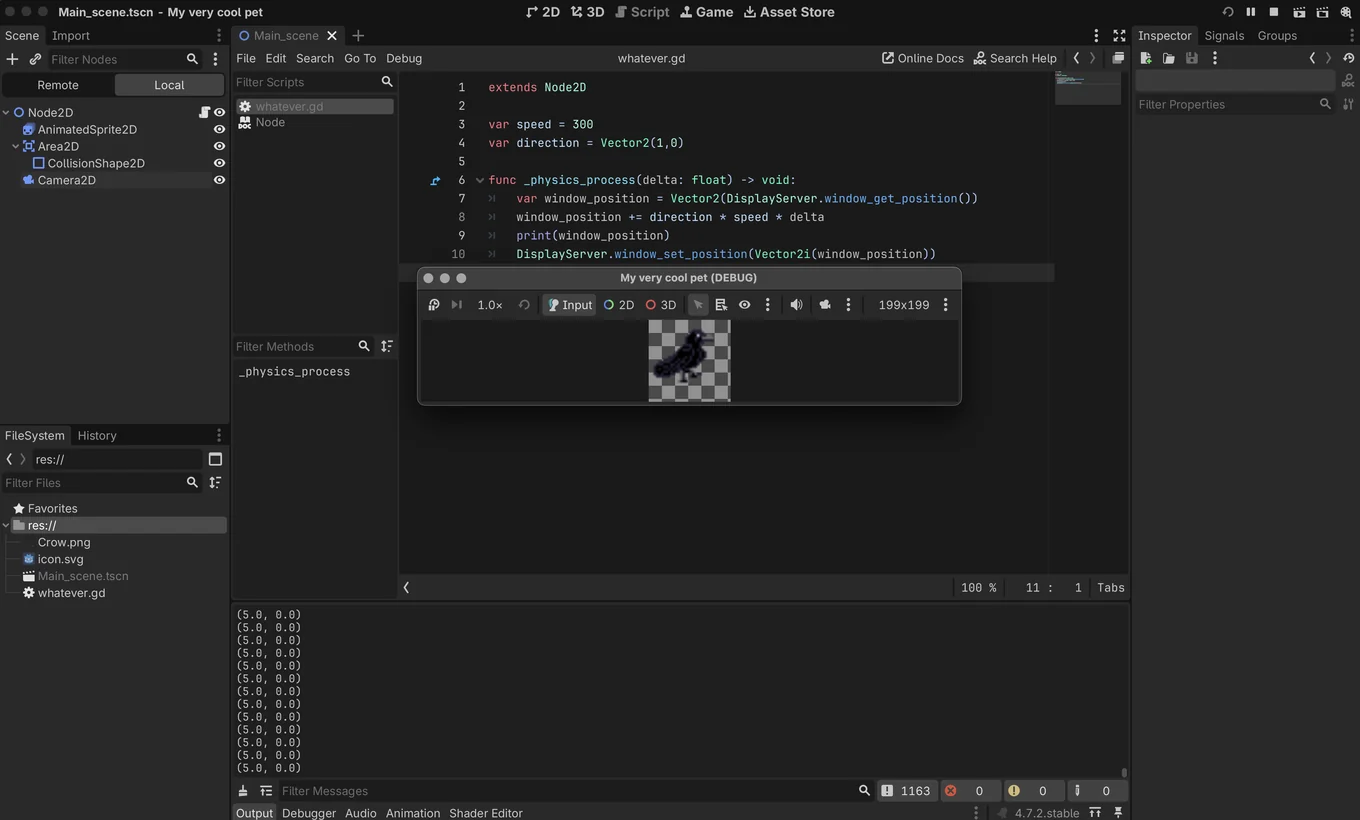
and you will see it do…. nothing
This is because Godot embeds your project by default, and the DisplayServer doesn’t work when it’s embedded.
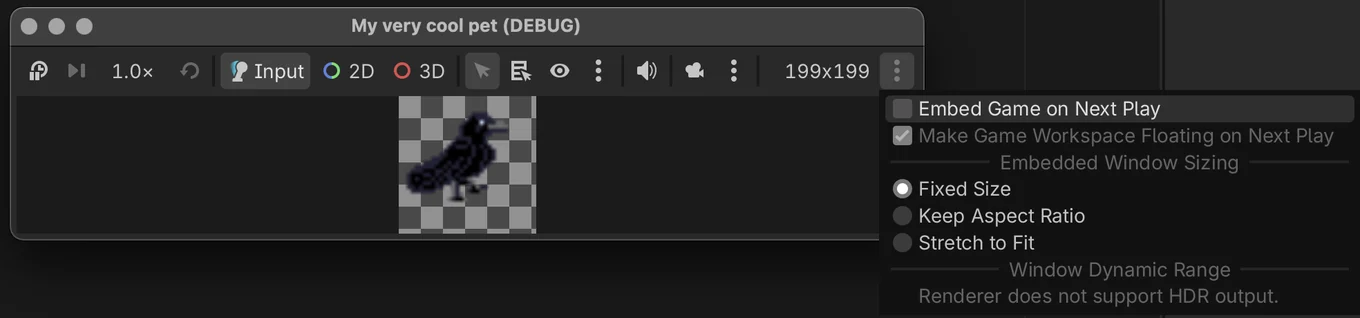
under the 3 dot menu on the right of the embedded player, disable ‘Embed Game on Next Play’
Press Command B on macOS or F5 on Windows and Linux again to try it, and you should see it move! It will walk straight off your screen though, which is what we’ll fix now.
2. Keep it on screen
To stop your pet from leaving you, we need to know how big the screen is and how big the window is. Add these variables under the others:
var direction = Vector2(1,0)
var screen_size = Vector2()
var window_size = Vector2(200, 200)
window_size is 200×200 because that's what we set in Project Settings earlier.
Godot’s _ready() method runs when the game starts, we don’t know the user’s screen size until the game starts so we’ll set screen_size on _ready()
Add this code to capture the user’s screen size
func _ready():
	screen_size = Vector2(DisplayServer.screen_get_size())

func _physics_process(delta: float) -> void:
Now we can use clamp to stop the position going past the edges. Add these two lines in _physics_process
	print(window_position)
	window_position.x = clamp(window_position.x, 0, screen_size.x - window_size.x)
	window_position.y = clamp(window_position.y, 0, screen_size.y - window_size.y)
	DisplayServer.window_set_position(Vector2i(window_position))
Play it, and your pet should now stop at the edge of the screen!
3. Bounce off the edges
Just having it stop is boring, so let's make it turn around instead! Add this code to _physics_process
	DisplayServer.window_set_position(Vector2i(window_position))

	if window_position.x <= 0 or window_position.x >= screen_size.x - window_size.x:
		direction.x *= -1
	if window_position.y <= 0 or window_position.y >= screen_size.y - window_size.y:
		direction.y *= -1
If the pet hits the left or right edge, we flip its horizontal direction. If it hits the top or bottom, we flip its vertical direction. Multiplying by -1 turns 1 into -1 and -1 into 1.
Click play and you should see it move back and forth!
4. Animations
Currently it looks a little strange, it just slides left and right. We need to use those animations we made earlier!
To do this we need our code to speak to the AnimatedSprite2D node, create a variable that references it like this
var window_size = Vector2(200, 200)

@onready var animated_sprite = $AnimatedSprite2D
Add this to _ready() to start the animation when the game starts
func _ready():
	screen_size = Vector2(DisplayServer.screen_get_size())
	animated_sprite.play("Walk_Right")
And add this line to flip the sprite when it touches a wall so it’s walking in the correct direction.
	if window_position.x <= 0 or window_position.x >= screen_size.x - window_size.x:
		direction.x *= -1
		animated_sprite.flip_h = !animated_sprite.flip_h
5. Let it take a break
Sometimes when the pet bumps into a wall, it should stop and chill for a moment. We need two new variables, one to say whether it's resting and one to count down how long for:
var window_size = Vector2(200, 200)

var idle_timer = 0.0
var is_idling = false
Add a function that gives the pet a 30% chance of resting and picks a random resting animation
func maybe_idle():
	if randf() < 0.3:
		is_idling = true
		idle_timer = randf_range(1.0, 3.0)
		var r = randi() % 3
		if r == 0:
			animated_sprite.play("Idle")
			speed = 0
randf_range(1.0, 3.0) means it rests for 1 to 3 seconds. randi() % 3 gives a random 0, 1 or 2, which we use to choose an animation.
Call maybe_idle() whenever the pet bounces. Update your bounce code from Step 3 so it looks like this:
	if window_position.x <= 0 or window_position.x >= screen_size.x - window_size.x:
		direction.x *= -1
		animated_sprite.flip_h = !animated_sprite.flip_h
		maybe_idle()
	if window_position.y <= 0 or window_position.y >= screen_size.y - window_size.y:
		direction.y *= -1
		maybe_idle()
While it's resting, the pet shouldn't move. Add this at the very top of _physics_process
func _physics_process(delta: float) -> void:
	if is_idling:
		idle_timer -= delta
		if idle_timer <= 0:
			is_idling = false
			speed = 300
			animated_sprite.play("Walk_Right")
		return
6. Pick it up and drag it around
This is what the Area2D and CollisionShape2D are for: they detect when you click on the pet. Get a reference to the Area2D with a new @onready line
@onready var animated_sprite = $AnimatedSprite2D
@onready var area = $Area2D
Add two variables for dragging
var is_dragging = false
var drag_offset = Vector2()
drag_offset remembers where on the pet you grabbed it, so the pet doesn't jump so its corner snaps to your mouse.
Add a function that runs when you click on the Area2D:
func _on_area_input(_viewport, event, _shape_idx):
	if event is InputEventMouseButton and event.button_index == MOUSE_BUTTON_LEFT:
		if event.pressed:
			is_dragging = true
			var mouse_pos = Vector2(DisplayServer.mouse_get_position())
			var win_pos = Vector2(DisplayServer.window_get_position())
			drag_offset = mouse_pos - win_pos
		else:
			is_dragging = false
When you press the left mouse button, dragging starts and we remember the offset. When you let go, dragging stops and the pet wanders off in a new direction.
Connect this function to the Area2D's input_event signal, so Godot calls it on a click. Add this to _ready():
func _ready():
	screen_size = Vector2(DisplayServer.screen_get_size())
	animated_sprite.play("Walk_Right")
	area.input_event.connect(_on_area_input)
Finally, make the window follow the mouse while you're dragging. Add this at the very top of _physics_process()
func _physics_process(delta: float) -> void:
	if is_dragging:
		var mouse_pos = Vector2(DisplayServer.mouse_get_position())
		var new_win_pos = mouse_pos - drag_offset
		DisplayServer.window_set_position(Vector2i(new_win_pos))
		return

	if is_idling:
This goes first because dragging should win over everything else. If you're holding the pet, it shouldn't be resting or walking.
Don't forget to commit!
git add .
git commit -m "I did it!!!"
git push
7. Make it your own!
your project will be rejected if you just follow this guide and change nothing. Make the project your own! Experiment, and do something entirely different.
There are so many things you can do, and this guide is here to show you the ropes so you can do something for yourself.
If you need ideas or help, ask in #Playground we’ll be glad to help!
8. Export your pet and put it on itch.io
To publish your pet, we need to export your project as a downloadable app and put it on a distribution platform such as itch.io!
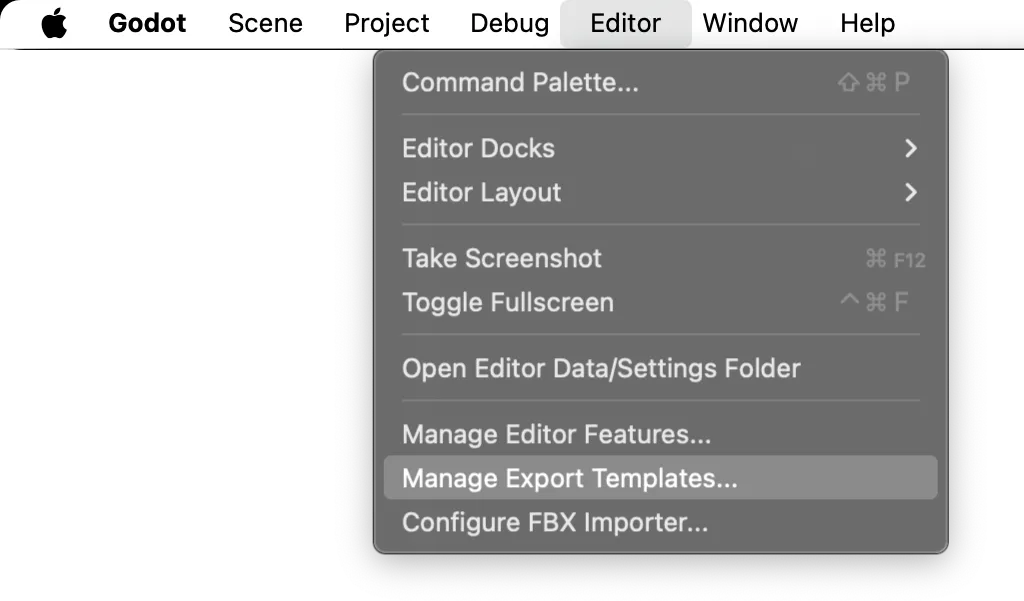
The first step is to install Godot's export templates. Open Editor > Manage Export Templates…
We're exporting for desktop, so select Desktop. When you have the platform you want to publish to selected, click Install Selected Templates.
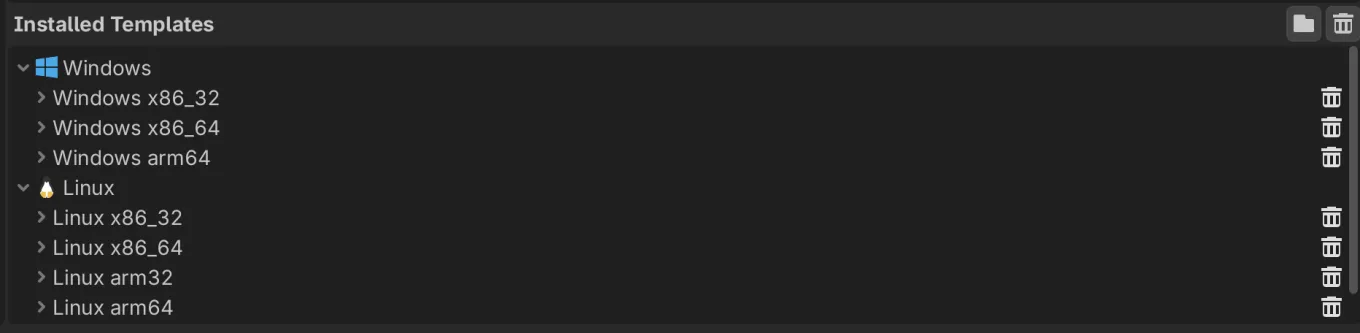
They should then install and show up under the Installed Templates menu.
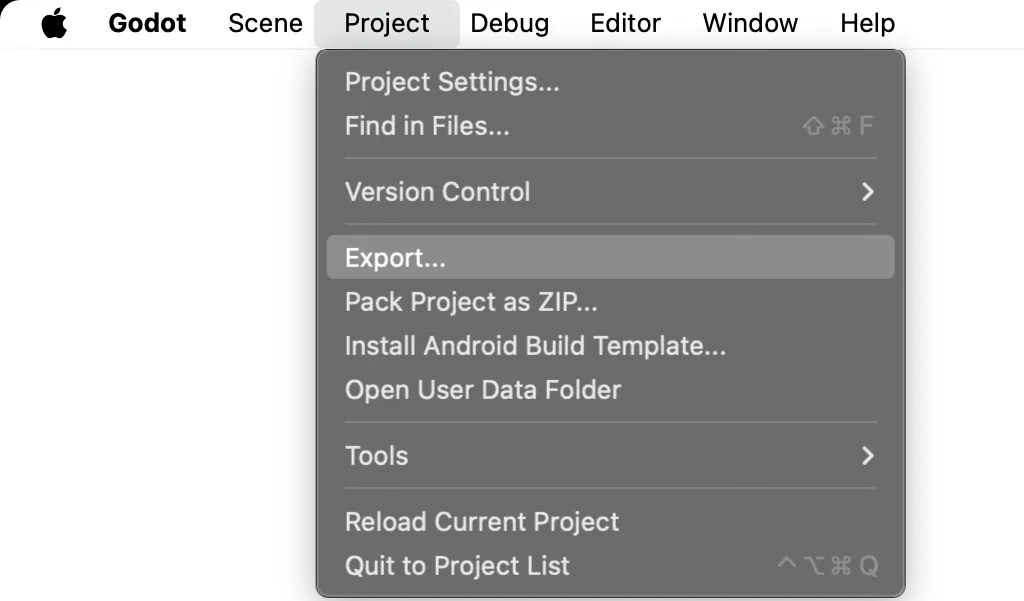
You can now export your project! Open the export menu under Project > Export…
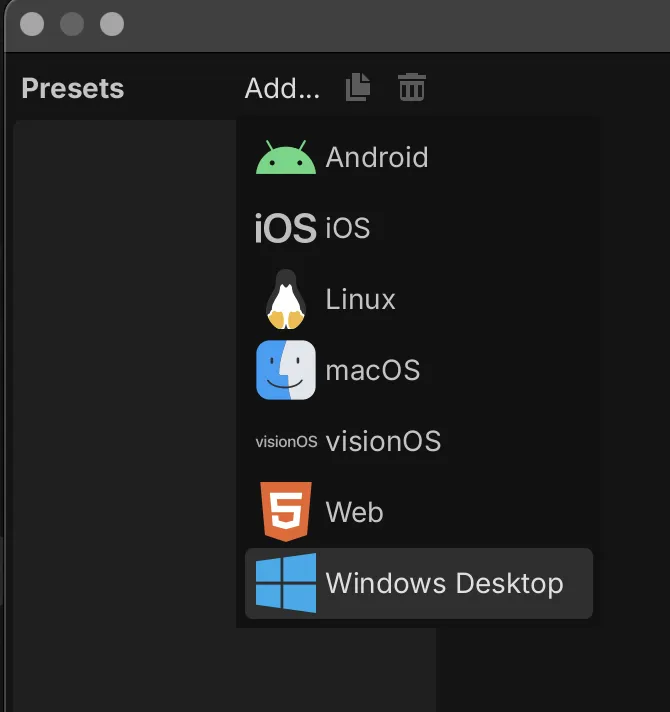
To export for Windows, in the Export window click Add… > Windows Desktop.
Turn on Embed PCK so the project is only one file.
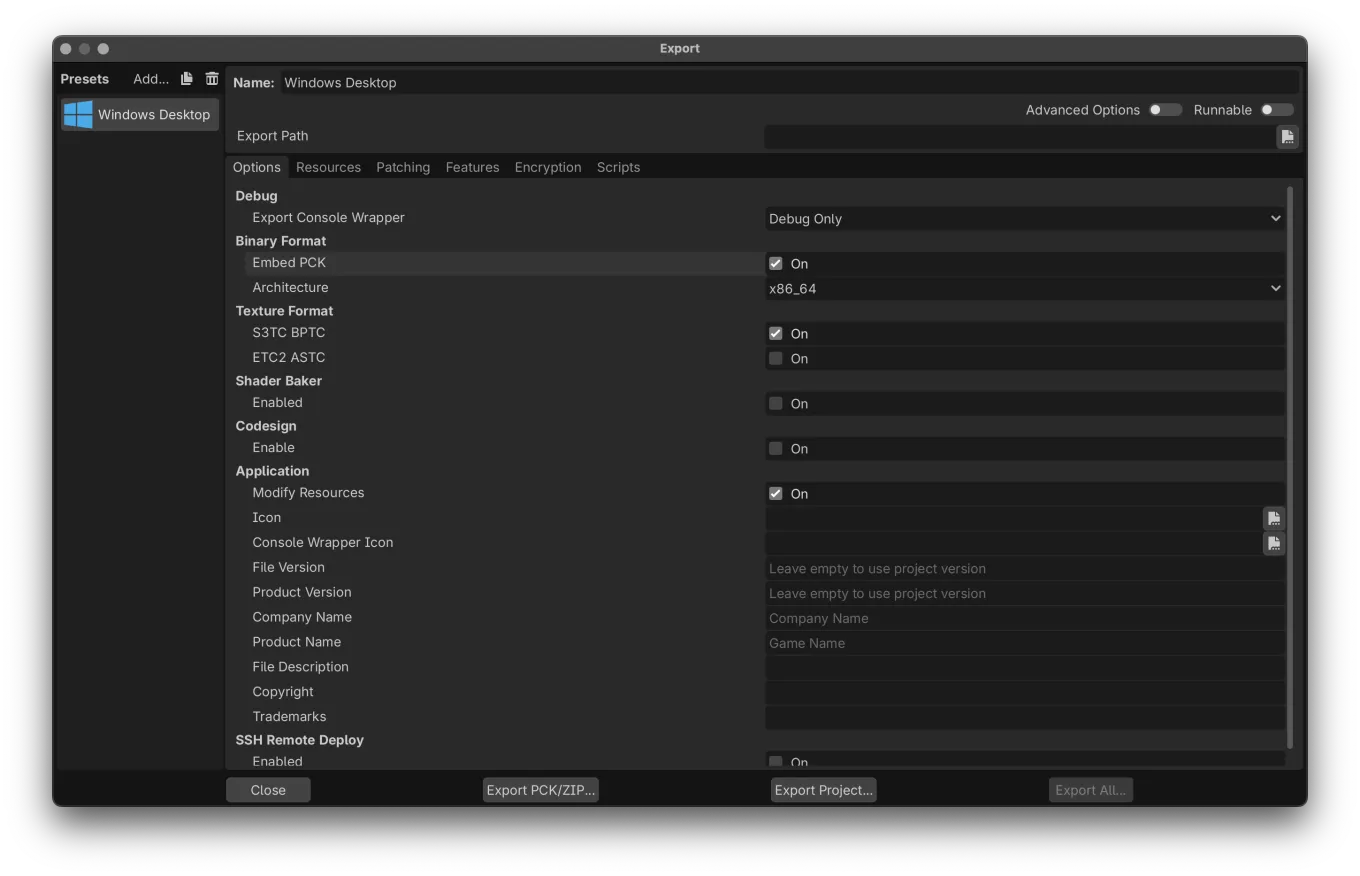
And then click Export Project…

Export to your Downloads, or somewhere else temporary, because you don't want this in your project folder.
It's time to upload your project to itch.io!
- Sign in or create an account on itch.io.
- Open the creator dashboard at itch.io/dashboard
- And create a new project.
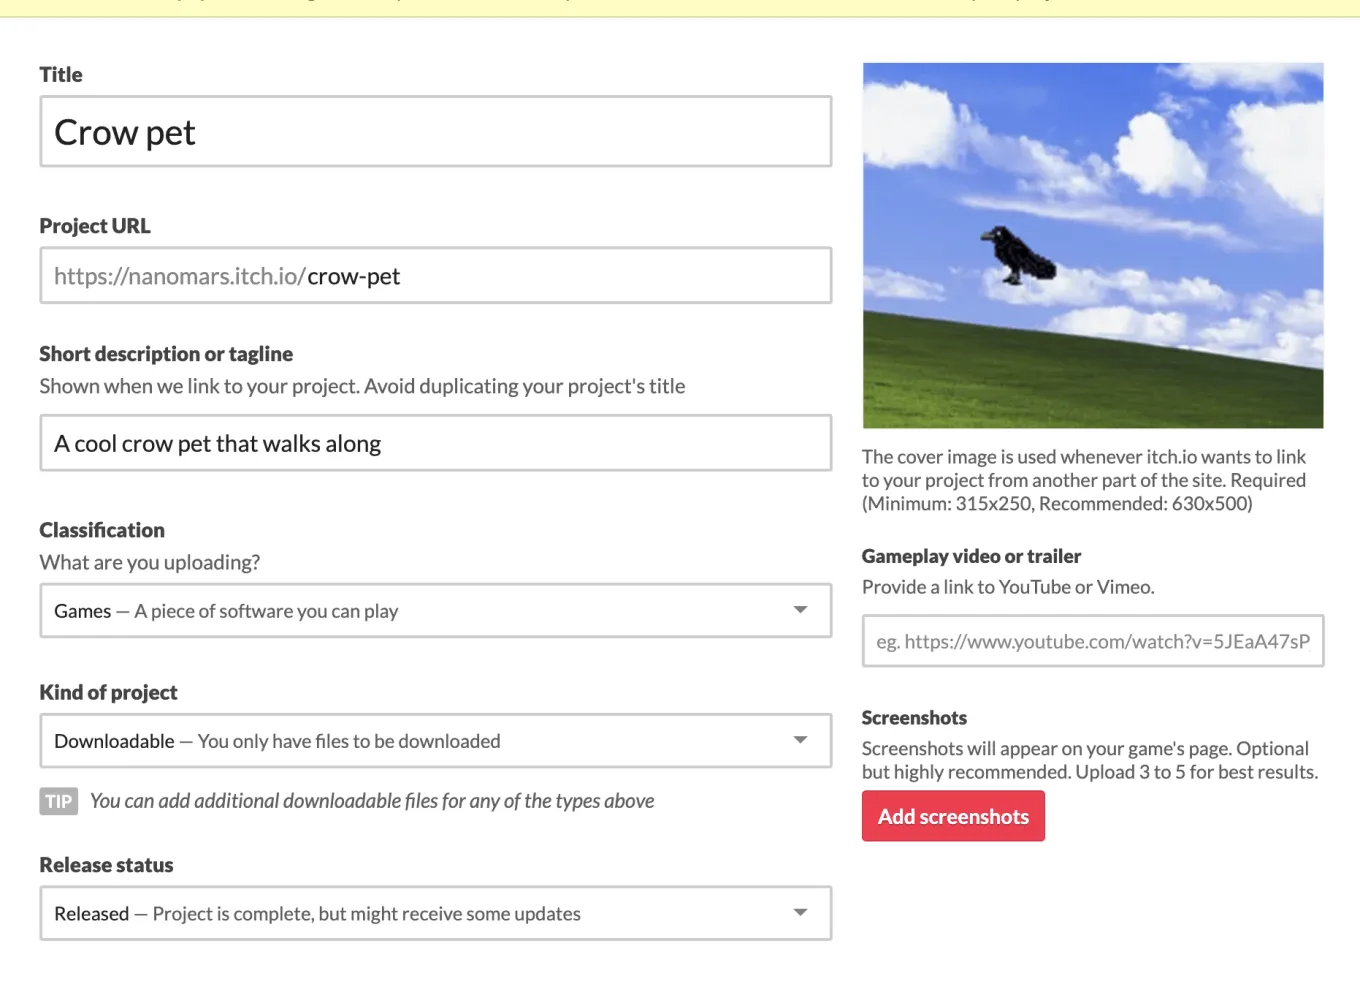
Fill it out!!!! Add a cover image, a tagline, a name and screenshots for the world to see.
Scroll down and upload the playable files.
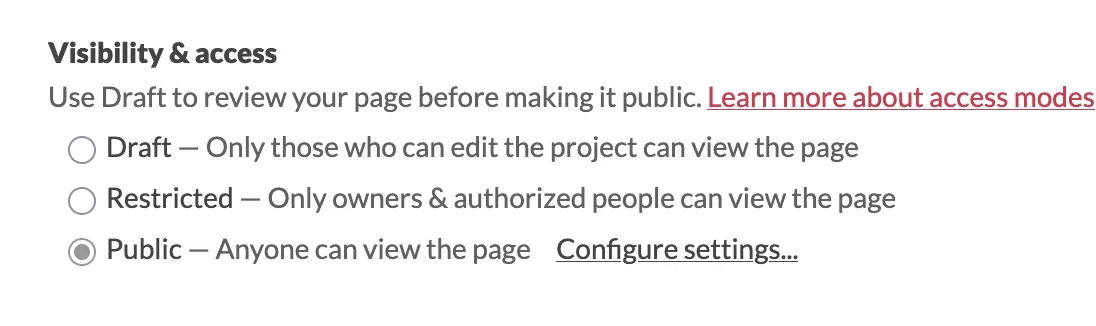
And then set the visibility to public.
and of course ship!