Build a desktop pet in Godot
step 2 of 6: Build the scene
Finally, we’re set up! Let's start making the pet
Let's start by making a 2D scene, this will be the world your pet will live in.
Click 2D scene in Godot to create a 2D scene
then press Command S on macOS or Ctrl+S on Windows and Linux to save, and give your scene a name.
for macOSWindowsLinux. on another computer?
Now that you have the scene, let's add some things to it.
In the Scene panel (top left), click + to add a new node.
- type animatedSprite 2D into the search bar.
- Select AnimatedSprite2D, and click Create.
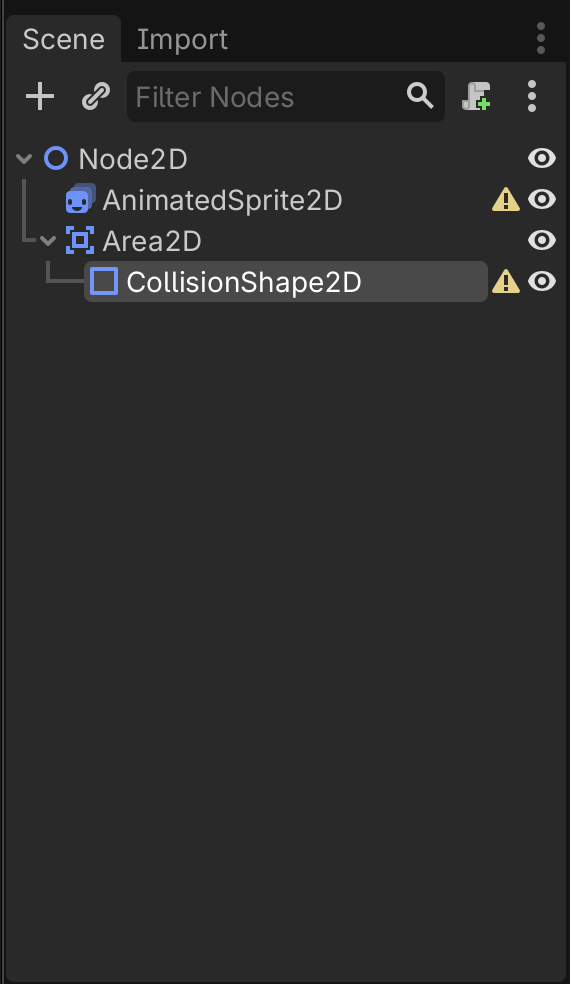
Repeat this process to add an Area2D node and a CollisionShape2D node.
Drag the CollisionShape2D node onto the Area2D node so the CollisionShape2D node becomes a child of the Area2D node
Once you’ve done that your scene tree should look like this.
Let's make the scene transparent!
By default a Godot window has a background, but we want our sprite to sit on the desktop with no background!
to do this we need to adjust the project’s settings.
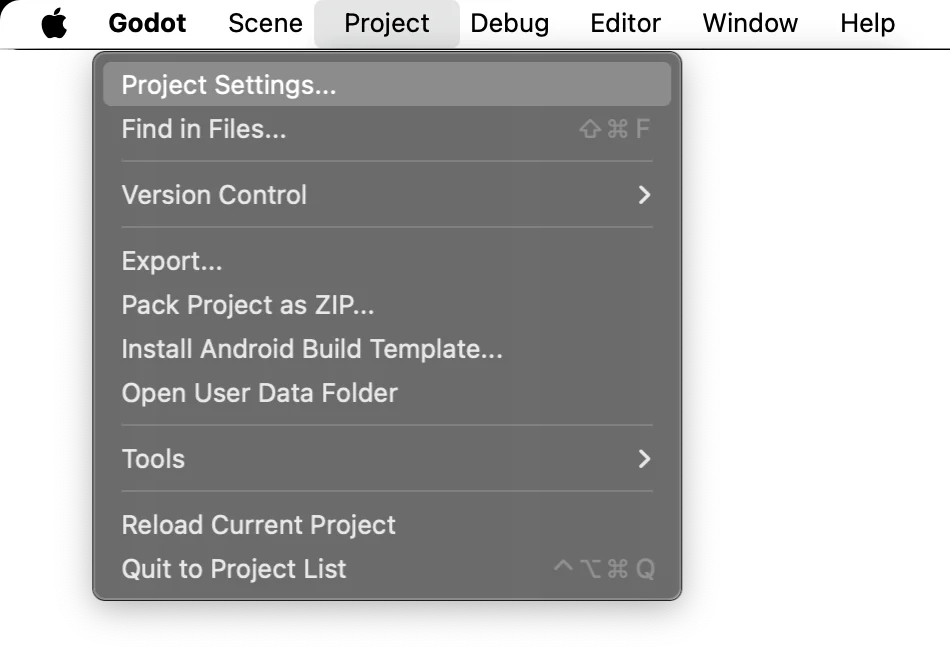
Click Project > Project Settings…
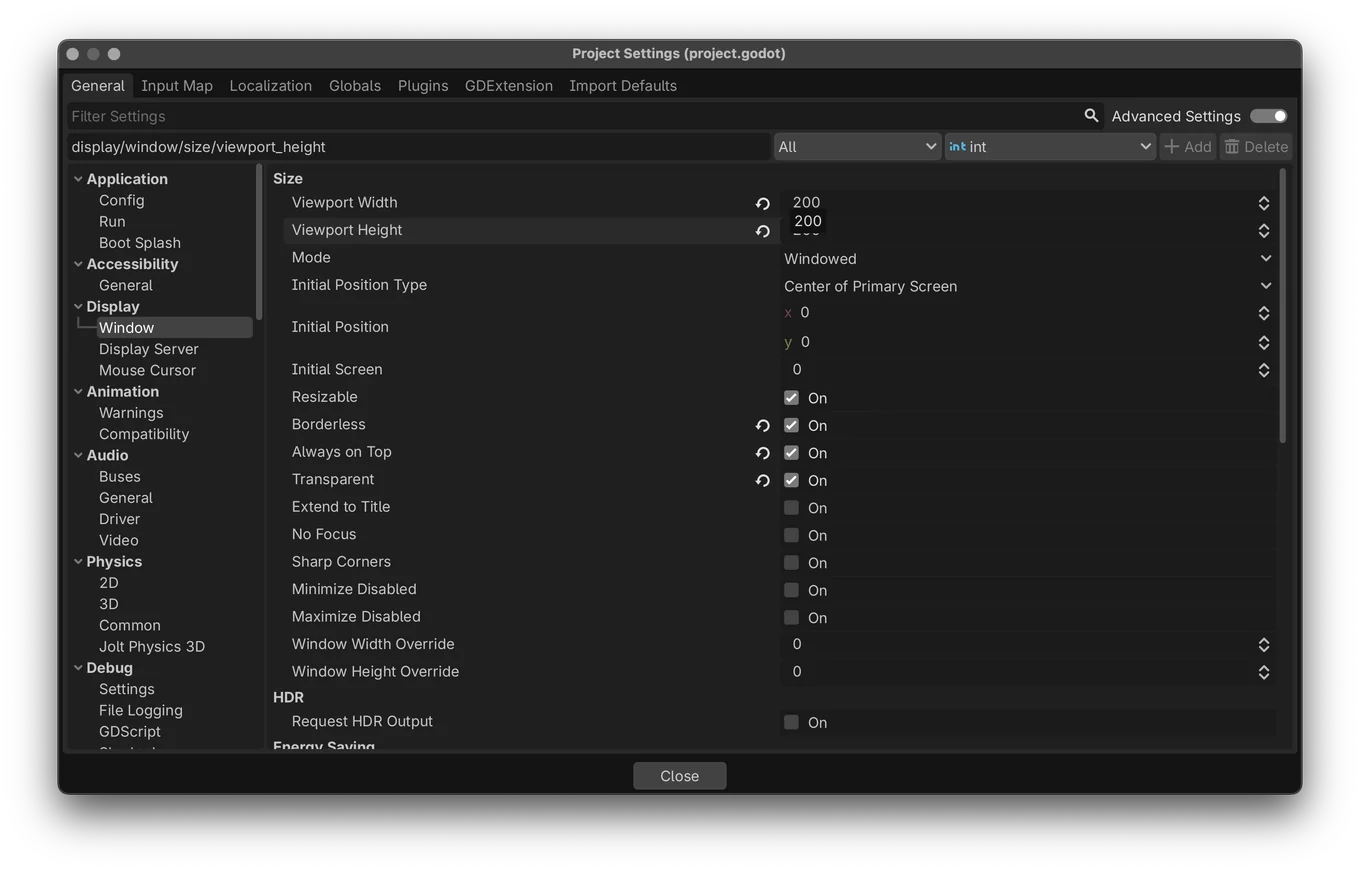
make sure the Advanced Settings toggle in the top right of Project Settings is on, or some of the settings below won’t show up.
under the Window tab on the left of the Project Settings menu we want to change a couple settings.
set Viewport Width to 200, and Viewport Height to 200. Just enough for your pet!
make sure
- Borderless
- Always on Top
- Transparent
are on
Then search for Per Pixel, select Window and enable Per Pixel Transparency
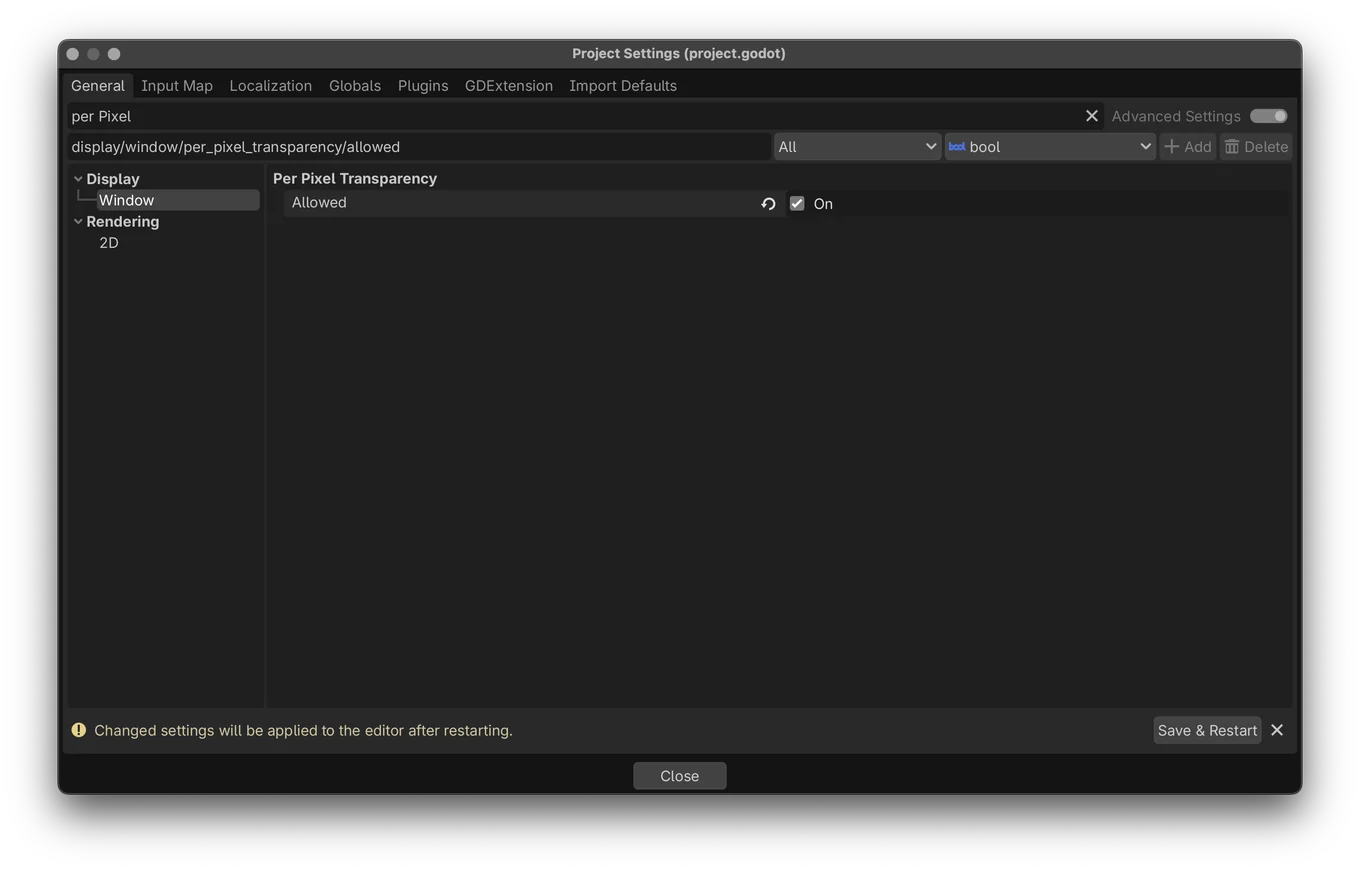
once you’ve done that search for Rendering in the top bar, select Viewport and enable Transparent Background
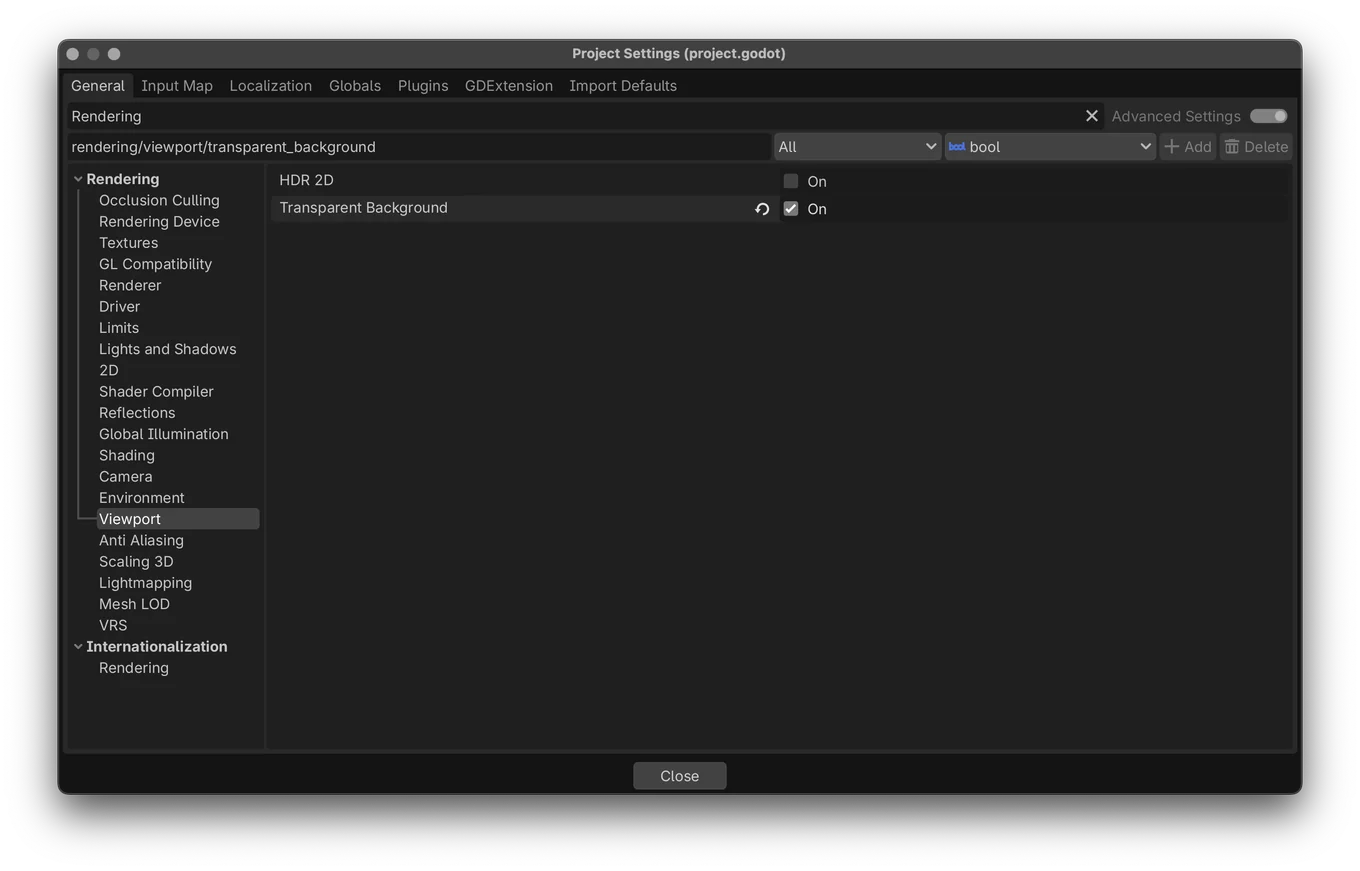
You’ll see a pop up at the bottom prompting to save & restart. Click the button and wait for Godot to restart
